First Things First
Welcome to the SharpEdge package documentation! This package offers a range of efficient image processing functions for manipulating and transforming images.
Before we explore the available functions, it’s important to understand how to work with image data. This tutorial will guide you through the process of loading images from various sources, visualizing the results and converting them into numpy arrays. We will also cover the key differences between grayscale and RGB images, and explain when and why you might need to perform color scale conversions.
By the end of this tutorial, you’ll have the foundational knowledge needed to effectively use the SharpEdge functions and interpret their effects on images.
If you are not familiar with how diffrent colors are represented numerically using RGB 0-1 or RGB 0-255, we recommend you check out this website RGB Color Picker.
Import Necessary Libraries
Let us introduce you to the libraries used in this software package and/or tutorial:
NumPy: The core package in software for handling image data as arrays, enabling efficient manipulation of pixel values.
Pillow: Enable image loading. Included as dependency in software for ease of user usage, not utilized in software functions.
Matplotlib: Provide image display capabilities. Included as dependency in software for ease of user usage, not utilized in software functions..
skimage (scikit-image): Used purely for providing sample images for demonstration purposes in the tutorial. It is not required to run the package.
# Importing necessary libraries
import numpy as np
from PIL import Image
import matplotlib.pyplot as plt
from skimage import data
Matplotlib is building the font cache; this may take a moment.
---------------------------------------------------------------------------
KeyboardInterrupt                         Traceback (most recent call last)
Cell In[1], line 4
      2 import numpy as np
      3 from PIL import Image
----> 4 import matplotlib.pyplot as plt
      5 from skimage import data

File ~/checkouts/readthedocs.org/user_builds/sharpedge/envs/stable/lib/python3.11/site-packages/matplotlib/pyplot.py:57
     55 from cycler import cycler  # noqa: F401
     56 import matplotlib
---> 57 import matplotlib.colorbar
     58 import matplotlib.image
     59 from matplotlib import _api

File ~/checkouts/readthedocs.org/user_builds/sharpedge/envs/stable/lib/python3.11/site-packages/matplotlib/colorbar.py:19
     16 import numpy as np
     18 import matplotlib as mpl
---> 19 from matplotlib import _api, cbook, collections, cm, colors, contour, ticker
     20 import matplotlib.artist as martist
     21 import matplotlib.patches as mpatches

File ~/checkouts/readthedocs.org/user_builds/sharpedge/envs/stable/lib/python3.11/site-packages/matplotlib/contour.py:15
     13 import matplotlib as mpl
     14 from matplotlib import _api, _docstring
---> 15 from matplotlib.backend_bases import MouseButton
     16 from matplotlib.lines import Line2D
     17 from matplotlib.path import Path

File ~/checkouts/readthedocs.org/user_builds/sharpedge/envs/stable/lib/python3.11/site-packages/matplotlib/backend_bases.py:49
     46 import numpy as np
     48 import matplotlib as mpl
---> 49 from matplotlib import (
     50     _api, backend_tools as tools, cbook, colors, _docstring, text,
     51     _tight_bbox, transforms, widgets, is_interactive, rcParams)
     52 from matplotlib._pylab_helpers import Gcf
     53 from matplotlib.backend_managers import ToolManager

File ~/checkouts/readthedocs.org/user_builds/sharpedge/envs/stable/lib/python3.11/site-packages/matplotlib/text.py:16
     14 from . import _api, artist, cbook, _docstring
     15 from .artist import Artist
---> 16 from .font_manager import FontProperties
     17 from .patches import FancyArrowPatch, FancyBboxPatch, Rectangle
     18 from .textpath import TextPath, TextToPath  # noqa # Logically located here

File ~/checkouts/readthedocs.org/user_builds/sharpedge/envs/stable/lib/python3.11/site-packages/matplotlib/font_manager.py:1643
   1639     _log.info("generated new fontManager")
   1640     return fm
-> 1643 fontManager = _load_fontmanager()
   1644 findfont = fontManager.findfont
   1645 get_font_names = fontManager.get_font_names

File ~/checkouts/readthedocs.org/user_builds/sharpedge/envs/stable/lib/python3.11/site-packages/matplotlib/font_manager.py:1637, in _load_fontmanager(try_read_cache)
   1635             _log.debug("Using fontManager instance from %s", fm_path)
   1636             return fm
-> 1637 fm = FontManager()
   1638 json_dump(fm, fm_path)
   1639 _log.info("generated new fontManager")

File ~/checkouts/readthedocs.org/user_builds/sharpedge/envs/stable/lib/python3.11/site-packages/matplotlib/font_manager.py:1103, in FontManager.__init__(self, size, weight)
   1100 for path in [*findSystemFonts(paths, fontext=fontext),
   1101              *findSystemFonts(fontext=fontext)]:
   1102     try:
-> 1103         self.addfont(path)
   1104     except OSError as exc:
   1105         _log.info("Failed to open font file %s: %s", path, exc)

File ~/checkouts/readthedocs.org/user_builds/sharpedge/envs/stable/lib/python3.11/site-packages/matplotlib/font_manager.py:1136, in FontManager.addfont(self, path)
   1134     self.afmlist.append(prop)
   1135 else:
-> 1136     font = ft2font.FT2Font(path)
   1137     prop = ttfFontProperty(font)
   1138     self.ttflist.append(prop)

KeyboardInterrupt:
Load Image
We will start by loading an image from different sources: from the disk and from a library (skimage).
Load Image from Disk
Let’s begin by loading an image locally available.
SharpEdge relies on the skimage library to load image data because it by default reads images in the range of [0, 255], which is the required input range for our functions.
If you have a preferred image loader, such as matplotlib’s plt.imread(), that by default loads images in the range of [0, 1], please ensure to transform the image data to the [0, 255] range (refer to Color Scale Conversion section) before passing it as an input into the functions.
# Load image locally available
image_disk = Image.open('../tests/test_image/seam_carve_input_2.png')
Load Image from Library
Alternatively, we can load sample images directly from the skimage library. Skimage comes with several sample images for quick testing.
# Load image from skimage library (Example: moon image)
image_skimage = data.camera()
Display Image
Now that we’ve loaded the image, let’s display it. Here’s how you can display both grayscale and RGB images using matplotlib.
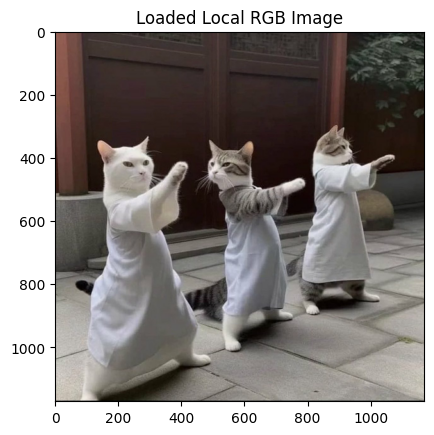
# Display RGB image from disk
plt.imshow(image_disk)
plt.title('Loaded Local RGB Image')
plt.show()
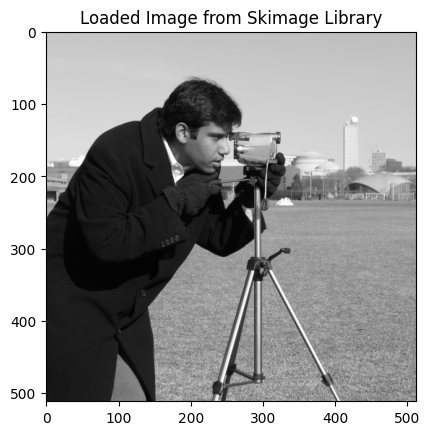
# Display grayscale image from skimage library
plt.imshow(image_skimage, cmap="gray")
plt.title('Loaded Image from Skimage Library')
plt.show()
Convert Image to Numpy
After loading the image, the next step is to convert it into a numpy array. This conversion allows direct manipulation of image data for tasks such as resizing, color conversion, and feature extraction, all of which are supported by the SharpEdge package.
Note: All image input argument for the functions in the SharpEdge package are expected to be in numpy array format. This ensures consistency and compatibility for efficient image processing
We will now display the numpy array representation of the image, along with its value range.
# Convert to numpy array and check the range
image_disk_np = np.array(image_disk)
print(f'First 3 rows and 3 columns of the image as numpy array (range [0, 255]):\n{image_disk_np[:3, :3]}')
First 3 rows and 3 columns of the image as numpy array (range [0, 255]):
[[[147  97  86]
  [147  97  86]
  [147  97  86]]

 [[147  97  86]
  [147  97  86]
  [147  97  86]]

 [[147  97  86]
  [147  97  86]
  [147  97  86]]]
# Convert to numpy array and check the range
image_lib_np = np.array(image_skimage)
print(f'Image as numpy array (range [0, 255]):\n{image_lib_np}')
Image as numpy array (range [0, 255]):
[[200 200 200 ... 189 190 190]
 [200 199 199 ... 190 190 190]
 [199 199 199 ... 190 190 190]
 ...
 [ 25  25  27 ... 139 122 147]
 [ 25  25  26 ... 158 141 168]
 [ 25  25  27 ... 151 152 149]]
Grayscale (2D) vs. RGB (3D)
We would like to specifically note the difference in dimensions between grayscale and RGB images. A grayscale image is represented as a 2D array, where each pixel has a single intensity value. In contrast, an RGB image is represented as a 3D array, where each pixel contains three values corresponding to the intensity of the Red, Green, and Blue color channels.
# Let's print the shape of both types of images for comparison
print(f'Grayscale shape: {image_lib_np.shape}')
print(f'RGB shape: {image_disk_np.shape}')
Grayscale shape: (512, 512)
RGB shape: (1171, 1170, 3)
Color Scale Conversion (If Needed)
As mentioned above, to ensure input range compatibility with functions within the SharpEdge package, it is necessary to convert the color scale of the image when working with images in the [0, 1] range. Below is one way to perform this conversion:
# Convert image from [0,1] to [0,255]
# image_converted = (image_to_convert * 255).astype(np.uint8)
Export Image (If Needed)
After transforming your images with our package, you might want to export the result to local disk. You can use the plt.imsave() function for this. Make sure to set the correct vmin and vmax to match the value range in your image array.
If your image is grayscale (2D array), you can set
cmap="gray".If it’s an RGB image (3D array with shape (H, W, 3)), simply omit the cmap parameter.
# Save output image array as image file in local disk
# plt.imsave(fname='SAMPLE_GRAY.png', arr=image_skimage, cmap="gray", vmin=0, vmax=255)
# plt.imsave(fname='SAMPLE_RGB.png', arr=image_disk, vmin=0, vmax=1)
Utility Class and input_checker Function
Finally, you might notice that SharpEdge has a Utility class with input_checker function specifically designed to verify that the input data meets the necessary requirements. This utility checks the following:
Image format: The image must be a numpy array. Formats such as TIFF or GIF are not supported.
Numpy shape: The image must have a 3D shape for RGB images and a 2D shape for grayscale images. If unexpected or redundant channels are detected, an error will be raised.
Image size: The image must not have a size of (0, 0), as this would be an invalid input.
Data color range: The pixel values must be in the range of [0, 255].
Please note that this Utility Class and the input_checker function are intended for developer use ONLY. The necessary validation has already been incorporated into the individual functions, so you won’t need to manually validate inputs in most cases. The details above are provided for informational purposes only.
Final Remarks
Now that you have the necessary tools to work with the package, feel free to dive into the various functions and explore the techniques available. Please refer to the full documentation for more details, and have fun coding and experimenting with the capabilities of the SharpEdge package!